Showing posts with label three colour background. Show all posts

Wednesday, 14 September 2011

At Sanctuary's Gate

Here is the finished painting!
I've deepened the shadows, to make it feel more three dimensional.
I do hope you have enjoyed seeing it develop.
It will also take its place on my permanent gallery site HERE

At Sanctuary's Gate


Tuesday, 13 September 2011

Another stage of At Sanctuary's Gate

I worked some more on this painting that I showed the early stages of yesterday.

I'm pleased with how the layers are progressing, but I do need to add some more shadows, to make it really sing - and then I'll be done.

In the meantime, stage 3...

Monday, 12 September 2011

Early stages of At Sanctuary's Gate

Enamoured of this three colour background, I wanted to try one more very strong set of colours before I mute them somewhat.

I decided to move away from Ultramarine, Alizarin and Aureolin and use Ultra Violet, Winsor Orange and Green Gold.

The door knocker is derived from the old medieval knocker which used to stand on the North Door of Durham Cathedral. In medieval times, one only had to knock and ask, and Sanctuary was granted to anyone fleeing from the brutal justice of the time. The Law of Sanctuary was abolished in England in the 1600s.

So my sanctuary knocker is set floating in the sky, representational of knocking at the Ultimate Sanctuary gate.

Drawing on the paper first, before putting the background washes in. They were very wet, because I wanted to press some cling film into them to create those interesting textural marks. When the cling film was in place, I weighted it with a couple of books to keep the film pressed in the washes. If you click to make the picture large, you will see that more clearly.


Next I start to paint the knocker, building up the colour in layers.
For this, you have to be patient. Each layer has to dry thoroughly. I'm hoping it will be worth it in the end.

Friday, 9 September 2011

Building some interest

Good morning, friends.

This post is not about increasing your savings, but building interest in the floral  painting :)

Underneath the flowers, brush in some clean wet water. Have your board at a tilt, so the water will run down a little.
With a light mix of ultramarine and sap green,  dab the brush just under the flower, so the wash blends into the clean water.

Also - make a couple of stems and swirls with the blue/green mix and add some aureolin dashes of paint with your rigger, to make some interesting flower spikes and vine type clingers.

With any luck, it should come out, something like this.


I am working at the day job this morning, but will be painting again this afternoon, so hopefully should have some more to show you tomorrow.
It will be building up some greens underneath the flowers. So don't wash your mix off your palette!

Thursday, 8 September 2011

Time for a watch along experiment.

Do you remember the Famous Cactus? It had the swirly swishy background.

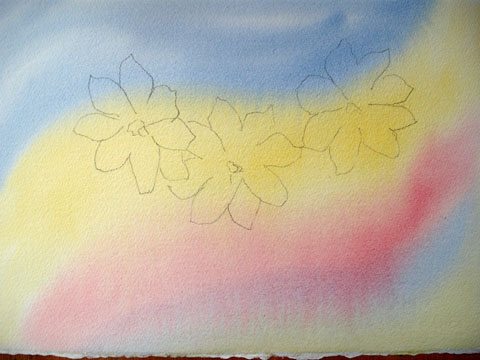
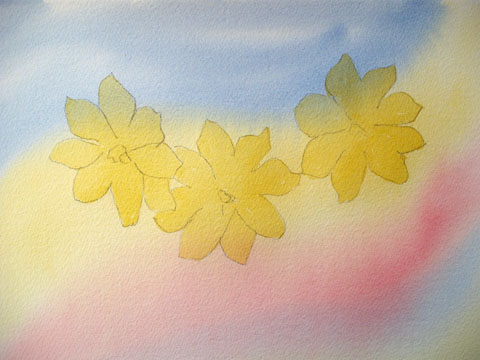
I was wondering what to paint, so thought to try an experiment.. the swirly background and a floral painting.

I have drawn the flowers from my imagination. Not sure if that's a good idea, but time will tell.

So here are the first few steps. If anyone wants to try this out for themselves - be my guest!

firstly, the drawing

Wet the paper completely, then add the background washes. A lazy S shaped swish of french ultramarine, alizarin crimson and aureolin.


after that has dried completely ( which takes a while as it was very wet) I add a second wash of aureolin to the flowers alone


that's it for today, will be back soon with some more stages.
Hope you've enjoyed and even feel inspired :)
Related Posts with Thumbnails